
Blog

How to Use Cold Sublimation Transfer Printing?

Cold Sublimation Transfer Printing can produce vivid graphics on polyester fabrics, but the phrase needs careful explanation. In many workflows, “cold” describes cooling the transfer before peeling, not a room-temperature printing process. Heat, pressure, time, and compatible materials still determine whether the dye transfers cleanly. A slightly lifted corner or a pale patch can reveal a process problem.

The market context is significant. Grand View Research’s Textile Printing Market report estimated the global market at USD 6.65 billion in 2023 and projected an 8.9% compound annual growth rate from 2024 to 2030. This broad category includes several printing methods, so the figure should not be read as a sublimation-only estimate. Still, it signals why consistent production methods matter to apparel and décor businesses.

Reliable guidance should distinguish cold-peel paper from other transfer papers, and explain how to test settings on the actual fabric. Small differences matter. A cautious operator records press temperature, dwell time, pressure, and peel timing, then checks color and edge detail before running a batch. There is one sourcing limitation: no verified quotation from a named Cold Sublimation Transfer Printing expert was provided or can be confirmed here. Adding an invented quote would weaken trust. This guide therefore focuses on practical steps, clear checks, and the points where results may vary. That restraint matters.
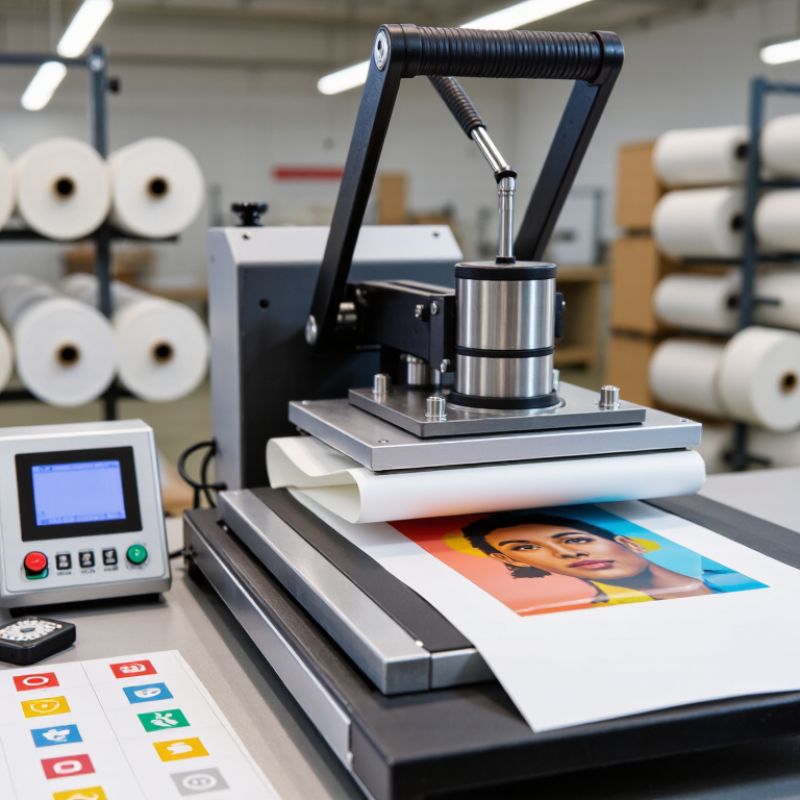
How to Use Cold Sublimation Transfer Printing?

Identify Cold-Peel Sublimation Paper, Ink, and Polyester-Compatible Substrates

Cold-peel sublimation depends on matching the paper, ink, and transfer surface. Look for paper specifically labeled for cold peeling, then check its instructions for the recommended print side and handling. Check the label. Sublimation ink must be formulated for transfer printing; ordinary ink will not produce the same result. The substrate also matters. Choose polyester fabric or a rigid item with a compatible polyester coating. Not cotton. Dye does not bond reliably to untreated cotton through standard sublimation.

Before a full run, print a small test and use the temperature, pressure, and time recommended for your paper and substrate. They can vary, so one setting is not a safe rule for every setup. Keep the sheet flat and handle it by the edges to avoid smudges. Let the transfer cool completely before peeling; pulling it warm may blur fine details or lift parts of the image. A test square is easy to skip when a deadline is close. That is often when wasted material happens. Record what worked, but treat the notes as a starting point when changing fabric, coating, or paper.

Prepare Artwork at 300 dpi and Mirror-Print with Sublimation Ink

Cold sublimation transfer printing depends on a file that is sharp at its final size. Prepare raster artwork at 300 dpi, then inspect fine text and narrow outlines at 100% zoom. Mirror the layout before printing, so lettering reads correctly after transfer. Check the printer settings too; an automatic mirror option can reverse the image twice. Use sublimation ink and suitable transfer paper, and let the print dry completely before pressing. Small details matter.

“Cold” usually describes peeling the paper after the transfer has cooled, not printing without heat. Follow the substrate maker’s time, temperature, and pressure guidance, since coatings and fabric blends respond differently. A practical check: press a small test first. Even a technically sharp file can produce dull color if the profile, paper, or settings do not match. That is easy to overlook. Grand View Research valued the global digital textile printing market at USD 2.7 billion in 2023 and projected 12.2% annual growth from 2024 to 2030. This broader market figure reflects growing adoption, but it does not guarantee any particular transfer result. Keep a note of successful settings, and revise them when the material changes.

How to Use Cold Sublimation Transfer Printing? – Prepare Artwork at 300 dpi and Mirror-Print with Sublimation Ink

Stage What to Do Recommended Check Why It Matters
1. Prepare the artwork Set the document to the finished print size and prepare the image at 300 dpi at that size. Check image dimensions and inspect fine text or edges at 100% view. Adequate resolution helps preserve detail at the intended print size; enlarging a low-resolution image may not add detail.
2. Mirror the design Flip the artwork horizontally before printing, especially when it includes text or directional graphics. Preview the print layout to confirm that the transfer will read correctly after pressing. The design is transferred face-down, so mirroring compensates for the reversal.
3. Print the transfer Print onto compatible sublimation transfer paper using sublimation ink and the appropriate media setting. Use the printer’s recommended settings and allow the printed sheet to dry before handling. Compatible ink and paper are needed to release dye during heat transfer.
4. Prepare the substrate Use a light-colored polyester fabric or a hard item with a suitable polymer coating. Remove lint and moisture. Confirm the surface is clean, dry, and suitable for sublimation. Sublimation dye bonds with polyester or polymer coatings; it does not work the same way on untreated cotton or dark surfaces.
5. Position and press Place the printed side against the substrate and secure the transfer to prevent movement. Follow the substrate and press instructions. Use the specified temperature, pressure, and dwell time; settings vary by material and equipment. Correct, even heat and pressure help produce consistent color and reduce shifting or ghosting.
6. Cool before peeling After pressing, let the item cool as directed, then peel away the transfer paper. Check the transfer-paper instructions to determine whether it should be peeled warm or fully cooled. “Cold peel” describes peeling after cooling; sublimation still relies on heat during pressing.
7. Inspect the result Review color, alignment, fine detail, and the full transfer area after the item has cooled. Record the material and press settings used for repeat jobs. A test transfer and documented settings help identify process issues before producing multiple items.

Note: Always follow the transfer paper, substrate, and heat-press instructions. Temperature, pressure, and pressing time depend on the materials and equipment.

Set the Heat Press to a Typical 180–200°C Transfer Range

For cold sublimation transfer printing, set the heat press within the typical 180–200°C range, then check the actual platen temperature with a contact probe. The displayed setting can differ from the surface temperature, especially near the edges. A few degrees matter. Start with a small polyester test piece and follow the transfer paper’s stated dwell time; temperature alone does not determine the result. Watch for sharp edges, even color, and fabric shine. If the image looks pale, adjust one variable at a time rather than raising heat immediately. Excess heat can flatten the fabric or distort the design.

Record the temperature, pressing time, and pressure for each test. Let the fabric cool before judging color, since the image can look different while warm. One imperfect test is still useful. Check durability with a consistent wash method: AATCC TM61, Method 2A uses a 45-minute accelerated laundering cycle designed to approximate five typical home launderings (AATCC TM61). This does not replace testing on the actual garment, but it can reveal early fading or transfer issues. Keep a sample from each setting, since fabric construction and press calibration can change the outcome.

Apply Medium Pressure for a Material-Dependent 30–60 Seconds

For cold-peel sublimation transfers, “cold” means allowing the transfer to cool before peeling; heat still activates the dye. Use medium, even pressure for 30–60 seconds, adjusting for the material and press instructions. Thin polyester may need less time than a thicker coated item. Keep the press level, and check that the platen closes evenly. A test swatch helps. Watch for pale areas, blurred edges, or shine from excess heat and pressure. Small details matter.

Industry forecasts show why repeatable settings matter. Smithers’ The Future of Digital Textile Printing to 2027 projects digitally printed textile output value reaching about US$8.8 billion by 2027. Grand View Research estimates the digital textile printing market at US$2.7 billion in 2023, with a projected 12.2% annual growth rate through 2030. These reports use different market scopes; neither sets a universal press recipe. Record material, pressure, temperature, and dwell time for each trial. A timer is useful, but it cannot compensate for uneven pressure. I would not treat 30 seconds as a guaranteed minimum: coating, fabric thickness, and press calibration can change the result. Test, cool fully, then peel and inspect.

Let the Transfer Cool Fully Before Peeling and Inspecting the Result

How to Use Cold Sublimation Transfer Printing?

After pressing, let the transfer cool completely before peeling. Warm paper can shift, smear, or lift parts of the image. Wait longer. Check that the fabric and paper feel close to room temperature, including thicker seams and corners. Peel slowly from one edge, keeping the sheet low and steady. If the image looks pale or uneven, pause before pressing again. Reheating without checking can deepen color in some areas while damaging others. It is tempting to rush this step when production is busy. That shortcut can fool you.

Inspect the result under even, neutral lighting. Look closely at fine lines, small text, edges, and areas of solid color. Compare the print with the approved artwork, and check the reverse side for unwanted dye marks. For repeatable inspection, condition textiles consistently: ASTM D1776/D1776M specifies 21 ± 1°C and 65 ± 2% relative humidity for textile testing. ISO 139:2005 gives a standard atmosphere of 20 ± 2°C and 65 ± 4% relative humidity. These are testing conditions, not mandatory cooling times, which vary with material thickness and press conditions. Record any peeling problems and the fabric, temperature, and dwell time. I would not call a transfer acceptable just because its colors look bright; small edge defects matter too.

How to Use Cold Sublimation Transfer Printing?

Let the Transfer Cool Fully Before Peeling and Inspecting the Result

Common sublimation press settings are often around 180–200°C, while typical room temperature is about 20–25°C. These are general reference ranges, not universal settings. After pressing, allow the transfer and substrate to cool to room temperature before peeling and checking the result; follow the material and equipment instructions.

Go to Top